|
|
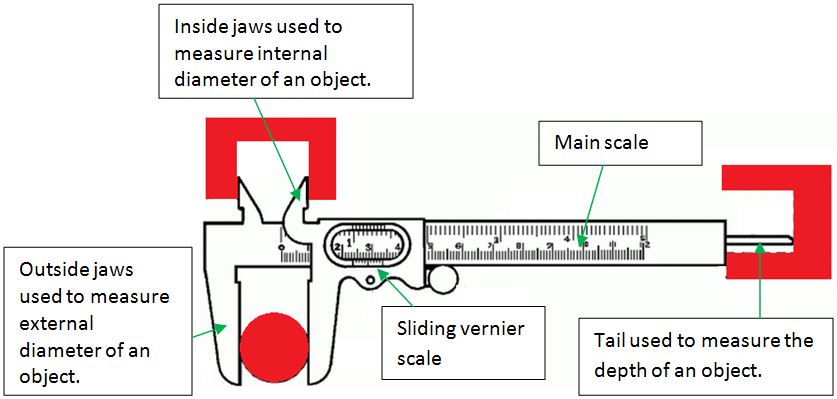
Vernier CalipersStructure of Vernier CalipersVernier Caliper consists of a main scale and a sliding vernier scale.
It is used to measure both the internal and external diameters as well as the depth of an object as shown in the diagram below. How to use?
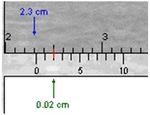
Step 4: Read the vernier scale mark that coincides with a marking on the main scale. In this case, the reading on the vernier scale is 0.02 cm.
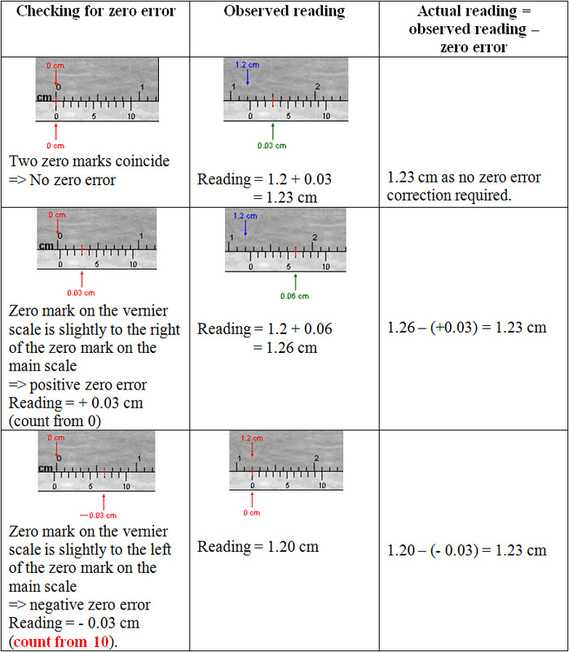
Step 5: The actual measurement is then the sum of main scale reading and vernier scale reading, i.e. 2.3 + 0.02 = 2.32 cm. Zero ErrorWhen using Vernier Calipers, we have to check for zero error. This is to check whether two zero marks coincide with each other when we are not measuring anything (jaws are in contact with each other). For reading on zero error, we have to read it from vernier scale.
You can play with the applet to help you in taking the reading correctly from vernier caliper.
Steps in playing the applet:
For no zero error case, 1) Check for zero error. In this case, both zero marks should be coincide with each other. 2) Move the bottom slider to certain position and take the reading. 3) Now, select "show reading" located at the bottom left to check your reading. For positive zero error, 1) Click reset. 2) Move the right slider up to any position and then take the zero error reading. 3) Move the bottom slider to certain position and take the reading, and then calculate the actual reading. 4) Now, select "show reading" located at the bottom left to check your actual reading. For negative zero error, 1) Click reset. 2) Move the right slider down to any position and then take the zero error reading. 3) Move the bottom slider to certain position and take the reading, and then calculate the actual reading. 4) Now, select "show reading" located at the bottom left to check your actual reading. |
|


